/// <summary>
/// 获取日期是第几周
/// </summary>
/// <param name="date">日期</param>
/// <returns>第几周</returns>
public static int GetWeekOfYear(DateTime date)
{
	//确定此时间在一年中的位置
	int dayOfYear = date.DayOfYear;
	//当年第一天
	DateTime tempDate = new DateTime(date.Year, 1, 1);
	//确定当年第一天
	int tempDayOfWeek = (int)tempDate.DayOfWeek;
	tempDayOfWeek = tempDayOfWeek == 0 ? 7 : tempDayOfWeek;
	//确定星期几
	int index = (int)date.DayOfWeek;
	index = index == 0 ? 7 : index;
	//当前周的范围
	DateTime retStartDay = date.AddDays(-(index - 1));
	DateTime retEndDay = date.AddDays(7 - index);
	//确定当前是第几周
	int weekOfYear = (int)Math.Ceiling(((double)dayOfYear + tempDayOfWeek - 1) / 7);
	if (retStartDay.Year < retEndDay.Year)
	{
		weekOfYear = 1;
	}
	return weekOfYear;
}
WordPress 5.x自定义上传路径 和 生成文件的URL地址
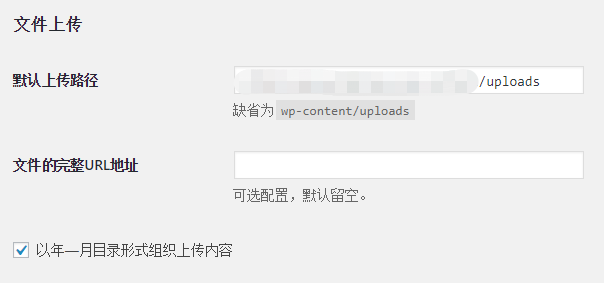
WordPress 3.5以上的版本,隐藏了后台的媒体(Media)设置页面 上传路径(upload_path)和文件 URL 地址(upload_url_path)的设定。
将下面的代码添加到主题的 functions.php 即可恢复设置界面:
if(get_option('upload_path')=='wp-content/uploads' || get_option('upload_path')==null) {
	update_option('upload_path',WP_CONTENT_DIR.'/uploads');
}
CentOS 7 安装 p11-kit 0.23.16
CentOS 7 源码安装 p11-kit,解决 configure: error: p11-kit >= 0.23.1 was not found. To disable PKCS #11 support 错误。
1、下载并解压
wget https://github.com/p11-glue/p11-kit/releases/download/0.23.16/p11-kit-0.23.16.tar.gz
tar -zxvf p11-kit-0.23.16.tar.gz
cd p11-kit-0.23.16
备用下载地址: https://down.24kplus.com/linux/p11-kit-0.23.16.tar.gz
2、编译安装
./configure \
--prefix=/usr \
--bindir=/usr/bin \
--sbindir=/usr/sbin \
--libexecdir=/usr/libexec \
--sysconfdir=/etc/p11-kit \
--libdir=/usr/lib64 \
--includedir=/usr/include \
--datarootdir=/usr/share \
--infodir=/usr/share/info \
--localedir=/usr/local \
--mandir=/usr/share/man \
--docdir=/usr/share/doc/p11-kit
make
make install
如果出现 configure: error: libtasn1 not found. Building without it results in significant loss of functionality. To proceed use --without-libtasn1 错误,执行:
yum install -y libtasn1-devel如果出现 configure: error: Package requirements (libffi >= 3.0.0) were not met: No package 'libffi' found 错误,执行:
yum install -y libffi-devel
CentOS 7 安装 libidn2 最新版
CentOS 7 源码安装 libidn2 最新版,解决 error while loading shared libraries: libidn2.so.4: cannot open shared object file: No such file or directory 错误
1、下载并解压
wget https://ftp.gnu.org/gnu/libidn/libidn2-latest.tar.gz
tar -zxvf libidn2-latest.tar.gz
cd libidn2*
2、编译安装
./configure \
--prefix=/usr \
--bindir=/usr/bin \
--sbindir=/usr/sbin \
--libexecdir=/usr/libexec \
--sysconfdir=/etc/libidn2 \
--libdir=/usr/lib64 \
--includedir=/usr/include \
--datarootdir=/usr/share \
--infodir=/usr/share/info \
--localedir=/usr/local \
--mandir=/usr/share/man \
--docdir=/usr/share/doc/libidn2 \
--with-packager \
--with-packager-version \
--with-packager-bug-reports
make
make install
CentOS 7 安装 openpts 0.2.6
CentOS 7 源码安装 openpts 0.2.6。
1、下载并解压
wget https://mirrors.xtom.com/osdn/openpts/54410/openpts-0.2.6.tar.gz
tar -zxvf openpts-0.2.6.tar.gz
cd openpts-0.2.6备用下载地址:https://down.24kplus.com/linux/openpts-0.2.6.tar.gz
2、编译安装
./bootstrap.sh
./configure \
--prefix=/usr \
--bindir=/usr/bin \
--sbindir=/usr/sbin \
--libexecdir=/usr/libexec \
--sysconfdir=/etc/openpts \
--libdir=/usr/lib64 \
--includedir=/usr/include \
--datarootdir=/usr/share \
--infodir=/usr/share/info \
--localedir=/usr/local \
--mandir=/usr/share/man \
--docdir=/usr/share/doc/openpts \
--with-tss \
--with-aru \
--enable-tnc
make
make install
如果出现 /include/openpts.h:50:17: fatal error: tss.h: No such file or directory 错误,安装:
yum install trousers-devel 如果出现 fatal error: uuid.h: No such file or directory 错误,安装:
yum install e2fsprogs-devel uuid-devel libuuid-develCentOS 7 安装 tpm-tools
CentOS 7 源码安装 tpm-tools 1.3.9.1
1、下载并解压
mkdir tpm-tools
cd tpm-tools
wget https://nchc.dl.sourceforge.net/project/trousers/tpm-tools/1.3.9.1/tpm-tools-1.3.9.1.tar.gz
tar -zxvf tpm-tools-1.3.9.1.tar.gz备用下载地址:https://down.24kplus.com/linux/tpm-tools-1.3.9.1.tar.gz
2、编译安装
./configure \
--prefix=/usr \
--bindir=/usr/bin \
--sbindir=/usr/sbin \
--libexecdir=/usr/libexec \
--sysconfdir=/etc/tpm-tools \
--libdir=/usr/lib64 \
--includedir=/usr/include \
--datarootdir=/usr/share \
--infodir=/usr/share/info \
--localedir=/usr/local \
--mandir=/usr/share/man \
--docdir=/usr/share/doc/tpm-tools
make
make install
如果出现 configure: error: tss lib not found: libtspi.so 错误:
yum install trousers-devel如果出现 configure: error: openssl lib not found: libcrypto.so 错误:
yum install openssl-develC# .NET 输出格式化的 Xml
默认输出的 InnerXml 显示在一行,看起来非常痛苦,特别是复杂XML文档,输出格式化后的 InnerXml 可以方便快速的查看。
public string GetFormattedInnerXml(XmlDocument doc)
{
    StringBuilder builder = new StringBuilder();
    using (StringWriter sw = new StringWriter(builder))
    {
        using (XmlTextWriter xtw = new XmlTextWriter(sw))
        {
            xtw.Formatting = Formatting.Indented;
            xtw.Indentation = 1;
            xtw.IndentChar = '\t';
            doc.WriteTo(xtw);
        }
    }
    return builder.ToString();
}
解决 WordPress imagick 未安装警告
解决 WordPress 5.x 站点健康( Site Health )检查提示 The optional module, imagick, is not installed, or has been disabled. 问题。
输入以下命令安装 imagick:
pecl install imagick此时会提示 Please provide the prefix of ImageMagick installation [autodetect]
输入:
/usr如果 php 是自行源码编译安装的请输入 php 安装目录,如:/usr/local
如果出现 configure: error: not found. Please provide a path to MagickWand-config or Wand-config program 错误,执行:
yum install ImageMagick-devel在php.ini文件中加入一行:
extension=imagick.so重启 php-fpm 服务
systemctl restart php-fpm优化 shadowsocks-libev 网络
优化 CentOS 7 或者 Ubuntu 16.04 以上版本下的 shadowsocks-libev 网络速度,让 shadowsocks-libev 轻松跑满宽带。同样适用于老版本 3.0 的 shadowsocks 优化。
如未安装 shadowsocks-libev 的可乘坐直达航班: CentOS 安装 Ubuntu 安装
一、优化吞吐量
1、新建配置文件:
sudo vi /etc/sysctl.d/local.conf复制粘贴:
#max open files
fs.file-max = 51200
#max read buffer
net.core.rmem_max = 67108864
#max write buffer
net.core.wmem_max = 67108864
#default read buffer
net.core.rmem_default = 65536
#default write buffer
net.core.wmem_default = 65536
#max processor input queue
net.core.netdev_max_backlog = 4096
#max backlog
net.core.somaxconn = 4096
#resist SYN flood attacks
net.ipv4.tcp_syncookies = 1
#reuse timewait sockets when safe
net.ipv4.tcp_tw_reuse = 1
#turn off fast timewait sockets recycling
net.ipv4.tcp_tw_recycle = 0
#short FIN timeout
net.ipv4.tcp_fin_timeout = 30
#short keepalive time
net.ipv4.tcp_keepalive_time = 1200
#outbound port range
net.ipv4.ip_local_port_range = 10000 65000
#max SYN backlog
net.ipv4.tcp_max_syn_backlog = 4096
#max timewait sockets held by system simultaneously
net.ipv4.tcp_max_tw_buckets = 5000
#turn on TCP Fast Open on both client and server side
net.ipv4.tcp_fastopen = 3
#TCP receive buffer
net.ipv4.tcp_rmem = 4096 87380 67108864
#TCP write buffer
net.ipv4.tcp_wmem = 4096 65536 67108864
#turn on path MTU discovery
net.ipv4.tcp_mtu_probing = 1

net.ipv4.tcp_congestion_control = bbr
2、运行:
sysctl --system3、编辑配置文件limits.conf
sudo vi /etc/security/limits.conf在文件结尾添加两行:
* soft nofile 51200
* hard nofile 51200
4、编辑 shadowsocks-libev 服务
# 服务配置文件名称视具体而定
sudo vi /etc/systemd/system/shadowsocks-libev.service
在[Service]之后加入 ExecStartPre=/bin/sh -c ‘ulimit -n 51200’
[Unit]
Description=Shadowsocks-libev Server
After=network.target

[Service]
Type=simple
# 服务配置可能有所不一样,视实际而定
# 在这里加入 ExecStartPre=/bin/sh -c 'ulimit -n 51200'
ExecStartPre=/bin/sh -c 'ulimit -n 51200'
ExecStart=/usr/local/bin/ss-server -c /etc/shadowsocks-libev/config.json -u
Restart=on-abort

[Install]
WantedBy=multi-user.target
5、重新加载 shadowsocks-libev 服务配置
sudo systemctl daemon-reload6、重启 Shadowsocks-libev 服务
sudo systemctl restart shadowsocks-libev二、开启TCP Fast Open
TCP Fast Open可以降低Shadowsocks服务器和客户端的延迟。实际上在上一步已经开启了TCP Fast Open,现在只需要在Shadowsocks配置中启用TCP Fast Open。1、编辑config.json:
sudo vi /etc/shadowsocks-libev/config.json将 fast_open 的值由 false 修改为 true
{
     "server":"0.0.0.0",
     "server_port":8388,
     "local_port":1080,
     "password":"password",
     "timeout":600,
     "method":"aes-256-cfb",
     /*这里设置 fast_open:true,如果没有则加入*/
     "fast_open": true
 }
2、重启 shadowsocks-libev 服务:
sudo systemctl restart shadowsocks-libev三、最后开启 Google BBR
优化到此基本完成。
CentOS 7 安装 libmaxminddb 1.3.2
CentOS 7 源码安装 libmaxminddb 1.3.2 最新版。 libmaxminddb 是 ngx_http_geoip2_module 依赖项之一。
1、下载源码,并解压
wget https://github.com/maxmind/libmaxminddb/releases/download/1.3.2/libmaxminddb-1.3.2.tar.gz
tar -xvf libmaxminddb-1.3.2.tar.gz
cd libmaxminddb-1.3.2备用下载地址:https://down.24kplus.com/linux/libmaxminddb-1.3.2.tar.gz
2、编译安装
./configure --prefix=/usr
make
sudo make install
sudo ldconfig