yum 源里最新的 gcc 版本是 4.8.5,但很多时候安装软件依赖于更高版本的 gcc,这时候只能通过手动源码安装最新版。

使用源码编译安装gcc耗时非常大,请要有耐心等待,耐心等待,耐心等待,重要的事情说三遍。

如果你觉得步麻烦可以使用 gcc一键安装 帮你完成!

1、下载并解压源码

wget https://ftp.gnu.org/gnu/gcc/gcc-9.2.0/gcc-9.2.0.tar.gz
tar -zxf gcc-9.2.0.tar.gz
cd gcc-9.2.0

备用下载地址:https://down.24kplus.com/linux/gcc-9.2.0.tar.gz

2、编译安装

下载必要软件包

./contrib/download_prerequisites

如果提示 tar (child): lbzip2: Cannot exec: No such file or directory 错误:

yum -y install bzip2

编译安装gcc

./configure --prefix=/usr \
--mandir=/usr/share/man \
--infodir=/usr/share/info \
--enable-bootstrap \
--enable-shared \
--enable-threads=posix \
--enable-checking=release \
--with-system-zlib \
--enable-__cxa_atexit \
--disable-libunwind-exceptions \
--enable-gnu-unique-object \
--enable-linker-build-id \
--with-linker-hash-style=gnu \
--enable-languages=c,c++ \
--enable-plugin \
--enable-initfini-array \
--disable-libgcj \
--enable-gnu-indirect-function \
--with-tune=generic \
--with-arch_32=x86-64 \
--build=x86_64-redhat-linux \
--disable-multilib
make
make install

如果出现 configure: error: GNAT is required to build ada 错误

yum -y install gcc-gnat -y

如果出现 fatal error: zlib.h: No such file or directory 错误

yum install zlib-devel -y

如果出现 configure: error: C++ preprocessor "/lib/cpp" fails sanity check 错误

yum install gcc-c++ -y

如果出现 makeinfo: command not found 错误

yum install texinfo -y

为了避免日后编译软件发生 checking for C compiler … not found 错误,执行:

ln -s /usr/bin/gcc /usr/bin/cc

4、检查是否正确安装

gcc -v

CentOS 7 源码安装 libzip 1.7.3,解决 error: Please reinstall the libzip distributioerror: system libzip must be upgraded to version >= 0.11 错误。

1、准备编译环境

yum install openssl-devel bzip2 bzip2-devel

2、下载源码,并解压

wget https://libzip.org/download/libzip-1.7.3.tar.gz \
&& tar -zxf libzip-1.7.3.tar.gz \
&& cd libzip-1.7.3

备用下载地址:https://down.24kplus.com/linux/libzip/libzip-1.7.3.tar.gz

3、编译安装

mkdir build && cd build \
&& cmake -DCMAKE_INSTALL_PREFIX=/usr .. \
&& make \
&& sudo make install

如果提示 cmake: command not found,需要先安装 cmake

CentOS 7 源码安装 CMake 3.15.5 最新稳定版。解决 cmake: command not found 问题。

1、准备编译环境

yum -y install gcc gcc-c++

2、获取源码,并解压

wget https://github.com/Kitware/CMake/releases/download/v3.15.5/cmake-3.15.5.tar.gz
tar -zxf cmake-3.15.5.tar.gz
cd cmake-3.15.5

备用下载地址:https://down.24kplus.com/linux/cmake/cmake-3.15.5.tar.gz

3、编译安装

./bootstrap --prefix=/usr --datadir=share/cmake --docdir=doc/cmake && make
sudo make install

4、检查是否正确安装

cmake --version

cmake version 3.15.5

CMake suite maintained and supported by Kitware (kitware.com/cmake).

CentOS 7 通过源码安装 re2c 最新版,解决 configure: WARNING: You will need re2c 0.13.4 or later if you want to regenerate PHP parsers 问题。

1、准备编译环境

yum -y install git automake gcc+ gcc-c++ libtool

2、获取源码、并编译安装

git clone https://github.com/skvadrik/re2c.git re2c
cd re2c
mkdir -p m4
./autogen.sh && ./configure --prefix=/usr && make
sudo make install

备用下载地址: https://down.24kplus.com/linux/re2c-1.1.1.tar.gz

3、检查是否安装成功

re2c -v

re2c 1.1.1

官方安装文档:http://re2c.org/install/install.html

1、 查看当前sql-mode

select @@sql_mode;
MySQL @@sql_mode

2、设置 sql-mode

拷贝原来的值,移除 NO_ZERO_IN_DATENO_ZERO_DATE 两项即可

SET sql_mode = 'ONLY_FULL_GROUP_BY,STRICT_TRANS_TABLES,ERROR_FOR_DIVISION_BY_ZERO,NO_AUTO_CREATE_USER,NO_ENGINE_SUBSTITUTION';

3、使新的 sql-mode 生效

FLUSH PRIVILEGES;

1、准备安装环境

sudo apt-get install python python-twisted python-openssl python-setuptools intltool python-xdg python-chardet geoip-database python-libtorrent python-notify python-pygame python-glade2 librsvg2-common xdg-utils python-mako python-dev

2、获取源码并安装

(1)获取源码

git clone git://deluge-torrent.org/deluge.git
cd deluge
git checkout -b master remotes/origin/master

(2)安装

python setup.py build
sudo python setup.py install --install-layout=deb

如果出现 error: command 'x86_64-linux-gnu-gcc' failed with exit status 1 错误,执行:

sudo apt-get install python-dev  \
     build-essential libssl-dev libffi-dev \
     libxml2-dev libxslt1-dev zlib1g-dev \
     python-pip

3、配置 deluge 和 deluge-web 服务

sudo cp packaging/systemd/deluged.service /etc/systemd/system/deluged.service
sudo cp packaging/systemd/deluge-web.service /etc/systemd/system/deluge-web.service

4、启动 deluged 和 deluge-web 服务,并设置自启动

sudo systemctl start deluged
sudo systemctl enable deluged

sudo systemctl start deluge-web
sudo systemctl enable deluge-web

5、开启远程访问(可选)

deluge-web默认只允许本地访问。默认端口:8112,默认密码:deluge

#启用远程访问
deluge-console "config -s allow_remote True"

#禁用远程访问
deluge-console "config allow_remote"

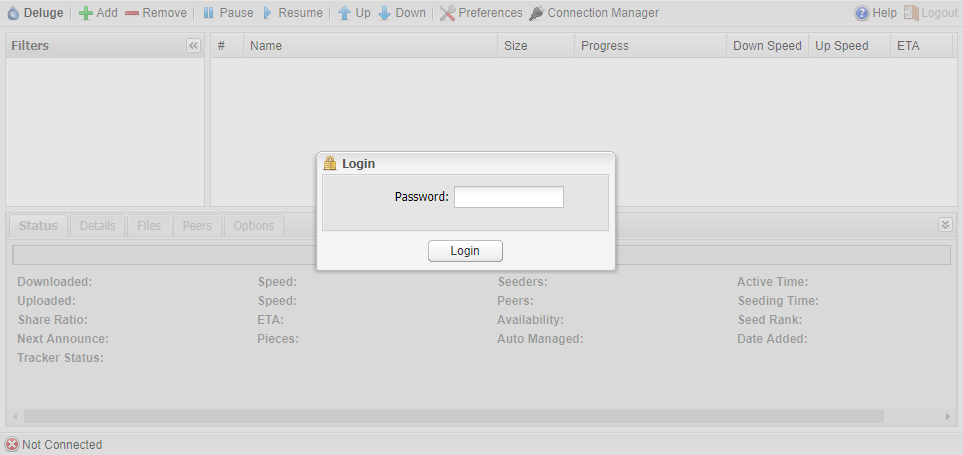
访问地址:http://你的IP:8112

deluge web

卸载 Deluge

sudo systemctl stop deluge-web
sudo systemctl disable deluge-web
sudo systemctl stop deluged
sudo systemctl disable deluged
sudo rm -rf /etc/systemd/system/deluge*

sudo rm -rf /usr/bin/deluge*

sudo rm -rf /usr/lib/python2.7/dist-packages/deluge*

利用 SheetJS js-xlsx 读取 Execl 数据转为JSON

<script type="text/javascript" src="Script/jquery.min.js"></script>
<script type="text/javascript" src="Script/js-xlsx/shim.min.js"></script>
<script type="text/javascript" src="Script/js-xlsx/xlsx.full.min.js"></script>
<script type="text/javascript">
	$(function () {
		$('.file-upload').change(function () {
			var $self = $(this);
			if (!this.files.length) {
				return;
			}
			//利用 FileReader 读取用户选中的Execl文件
			var reader = new FileReader();
			reader.onload = function (e) {
				var data = new Uint8Array(e.target.result);
				var workbook = XLSX.read(data, { type: 'array' });
				//获取第一个 Sheet 名称
				var sheetName = workbook.SheetNames[0];
				//获取第一个 Sheet
				var sheet = workbook.Sheets[sheetName];
				//转换为JSON格式数组
				var sheetJSONData = XLSX.utils.sheet_to_json(sheet);
			};
			reader.readAsArrayBuffer(this.files[0]);
		});
	});
</script>

相关文件下载