namespace Utility.Security
{
    /// <summary>
    /// RSA加密解密
    /// </summary>
    public class RSAUtil
    {
        /// <summary>
        /// RSA加密
        /// </summary>
        /// <param name="str">需要加密的字符串</param>
        /// <param name="encryptKey">密钥</param>
        /// <returns>加密后的字符串</returns>
        public static string RSAEncrypt(string str, string encryptKey)
        {
            byte[] bytes = Encoding.UTF8.GetBytes(str);
            byte[] privKeyBytes = Convert.FromBase64String(encryptKey);
            AsymmetricKeyParameter asymmetricKeyParameter = PrivateKeyFactory.CreateKey(privKeyBytes);
            IAsymmetricBlockCipher signer = new Pkcs1Encoding(new RsaEngine());
            signer.Init(true, asymmetricKeyParameter);
            //加密
            byte[] encryptBytes = signer.ProcessBlock(bytes, 0, bytes.Length);
            string rsaString = Convert.ToBase64String(encryptBytes);
            return rsaString;
        }

        /// <summary>
        /// RSA解密
        /// </summary>
        /// <param name="str">需要解密的字符串</param>
        /// <param name="decryptKey">密钥</param>
        /// <returns>解密后的字符串</returns>
        public static string RSADecrypt(string str, string decryptKey)
        {
            byte[] strBytes = Convert.FromBase64String(str);
            byte[] keyBytes = Convert.FromBase64String(decryptKey);
            AsymmetricKeyParameter asymmetricKeyParameter = PublicKeyFactory.CreateKey(keyBytes);
            IAsymmetricBlockCipher signer = new Pkcs1Encoding(new RsaEngine());
            signer.Init(false, asymmetricKeyParameter);
            byte[] decryptedBytes = signer.ProcessBlock(strBytes, 0, strBytes.Length);
            string decryptString = Encoding.UTF8.GetString(decryptedBytes);
            return decryptString;
        }
    }
}
C# .NET Linq Queryable扩展动态字段排序
解决 Linq 的 lambda 表达式排序不够灵活问题。
namespace Utility.Linq
{
    public static class QueryableExtend
    {
        /// <summary>
        /// 根据键按升序对序列的元素排序
        /// </summary>
        /// <typeparam name="TSource">source 中的元素的类型</typeparam>
        /// <param name="source">一个要排序的值序列</param>
        /// <param name="field">排序字段</param>
        /// <returns>一个 System.Linq.IOrderedQueryable T,根据键对其元素排序。</returns>
        public static IQueryable<TSource> OrderBy<TSource>(this IQueryable<TSource> source, string field)
        {
            source = source.OrderBy(field, "OrderBy");
            return source;
        }

        /// <summary>
        /// 根据键按降序对序列的元素排序
        /// </summary>
        /// <typeparam name="TSource">source 中的元素的类型</typeparam>
        /// <param name="source">一个要排序的值序列</param>
        /// <param name="field">排序字段</param>
        /// <returns>一个 System.Linq.IOrderedQueryable T,根据键对其元素排序。</returns>
        public static IQueryable<TSource> OrderByDescending<TSource>(this IQueryable<TSource> source, string field)
        {
            source = source.OrderBy(field, "OrderByDescending");
            return source;
        }

        /// <summary>
        /// 根据某个键按降序对序列中的元素执行后续排序。
        /// </summary>
        /// <typeparam name="TSource">source 中的元素的类型</typeparam>
        /// <param name="source">一个要排序的值序列</param>
        /// <param name="field">排序字段</param>
        /// <param name="isDescending">是否倒序(可选,默认否)</param>
        /// <returns>一个 System.Linq.IOrderedQueryable T,根据键对其元素排序。</returns>
        public static IQueryable<TSource> ThenBy<TSource>(this IQueryable<TSource> source, string field)
        {
            source = source.OrderBy(field, "ThenBy");
            return source;
        }

        /// <summary>
        /// 使用指定的比较器按降序对序列中的元素执行后续排序。
        /// </summary>
        /// <typeparam name="TSource">source 中的元素的类型</typeparam>
        /// <param name="source">一个要排序的值序列</param>
        /// <param name="field">排序字段</param>
        /// <param name="isDescending">是否倒序(可选,默认否)</param>
        /// <returns>一个 System.Linq.IOrderedQueryable T,根据键对其元素排序。</returns>
        public static IQueryable<TSource> ThenByDescending<TSource>(this IQueryable<TSource> source, string field)
        {
            source = source.OrderBy(field, "ThenByDescending");
            return source;
        }

        /// <summary>
        /// 根据键按升序对序列的元素排序
        /// </summary>
        /// <typeparam name="TSource">source 中的元素的类型</typeparam>
        /// <param name="source">一个要排序的值序列</param>
        /// <param name="field">排序字段</param>
        /// <param name="methodName">排序方法名</param>
        /// <returns>一个 System.Linq.IOrderedQueryable T,根据键对其元素排序。</returns>
        public static IQueryable<TSource> OrderBy<TSource>(this IQueryable<TSource> source, string field, string methodName)
        {
            if(source == null)
            {
                throw new ArgumentException("source");
            }
            if(field == null)
            {
                throw new ArgumentException("field");
            }
            if(methodName == null)
            {
                throw new ArgumentException("methodName");
            }
            Type entityType = typeof(TSource);
            ParameterExpression parameterExpression = Expression.Parameter(entityType, entityType.FullName);
            Expression propertyExpression = Expression.Property(parameterExpression, entityType.GetProperty(field));
            Expression expression = Expression.Lambda(propertyExpression, parameterExpression);
            PropertyInfo propertyInfo = entityType.GetProperty(field);
            Type propertyType = propertyInfo.PropertyType;
            Expression expr = Expression.Call(typeof(Queryable), methodName, new Type[] { entityType, propertyType }, source.Expression, expression);
            source = source.Provider.CreateQuery<TSource>(expr);
            return source;
        }
    }
}
CentOS / Oracle x64 安装 .NET Core SDK
注意:.NET Core仅支持64位系统。
1、添加 dotnet repos
在安装.NET之前,需要注册 Microsoft key,注册 repos 并安装所需的依赖项。
打开 terminal 并运行以下命令:
sudo rpm -Uvh https://packages.microsoft.com/config/rhel/7/packages-microsoft-prod.rpm2、 安装 .NET SDK
在 terminal 中,运行以下命令:
sudo yum update
sudo yum install dotnet-sdk-2.2官方英文原文:https://dotnet.microsoft.com/download/linux-package-manager/centos/sdk-current
Ubuntu 安装 .NET Core SDK 2.2
Ubuntu 16.04 或更高版本安装 .NET Core SDK,需要注意的是.NET Core仅支持 16.04 或更高版本的 64位系统。
1、注册 Microsoft key和 repos
在安装.NET之前,需要注册 Microsoft key,注册 repos 并安装所需的依赖项。
打开 terminal 并运行以下命令:
wget -q https://packages.microsoft.com/config/ubuntu/16.04/packages-microsoft-prod.deb
sudo dpkg -i packages-microsoft-prod.deb
2、 安装 .NET SDK
在 terminal 中,运行以下命令:
sudo apt-get install apt-transport-https
sudo apt-get update
sudo apt-get install dotnet-sdk-2.2如果出现Unable to locate package dotnet-sdk-2.2错误,运行以下命令:
sudo dpkg --purge packages-microsoft-prod && sudo dpkg -i packages-microsoft-prod.deb
sudo apt-get update
sudo apt-get install dotnet-sdk-2.2
如果还没有安装成功,可以尝试以下命令运行手动安装:
sudo apt-get install -y gpg
wget -qO- https://packages.microsoft.com/keys/microsoft.asc | gpg --dearmor > microsoft.asc.gpg
sudo mv microsoft.asc.gpg /etc/apt/trusted.gpg.d/
wget -q https://packages.microsoft.com/config/ubuntu/18.04/prod.list
sudo mv prod.list /etc/apt/sources.list.d/microsoft-prod.list
sudo chown root:root /etc/apt/trusted.gpg.d/microsoft.asc.gpg
sudo chown root:root /etc/apt/sources.list.d/microsoft-prod.list
sudo apt-get install -y apt-transport-https
sudo apt-get update
sudo apt-get install dotnet-sdk-2.2官方英文原文:https://dotnet.microsoft.com/download/linux-package-manager/ubuntu18-04/sdk-current
nginx 开启 https 安全连接
前言
HTTPS(全称:Hyper Text Transfer Protocol over Secure Socket Layer 或 Hypertext Transfer Protocol Secure,超文本传输安全协议),是以安全为目标的HTTP通道,简单讲是HTTP的安全版。
申请免费ssl证书的方式有很多,这里就不再多说。
1、在站点配置 server { } 中加入以下代码
#监听ssl默认端口443
#ipv4
listen 443 ssl;
#如果支持ipv6
listen [::]:443 ssl;

#注意:这里24kplus.com替换成你的证书名字
ssl_certificate  ssl/24kplus.com.pem;
ssl_certificate_key ssl/24kplus.com.key;
ssl_session_timeout 5m;
ssl_ciphers ECDHE-RSA-AES128-GCM-SHA256:ECDHE:ECDH:AES:HIGH:!NULL:!aNULL:!MD5:!ADH:!RC4;
ssl_protocols TLSv1.1 TLSv1.2;
ssl_prefer_server_ciphers on;
2、重启ningx
systemctl restart nginx启用ssl就这么简单!

免费SSL证书申请直达航班:
扩展 jQuery.fn.zIndex方法
扩展jquery.fn,增加获取或设置zIndex的function
/*扩展 jQuery.fn 的方法*/
jQuery.fn.extend({
    /*
    获取或设置zIndex
    */
    zIndex: function (zIndex) {
        if (zIndex !== undefined) {
            return this.css("zIndex", zIndex);
        }
        if (this.length) {
            var elem = $(this[0]), position, value;
            while (elem.length && elem[0] !== document) {
                // Ignore z-index if position is set to a value where z-index is ignored by the browser
                // This makes behavior of this function consistent across browsers
                // WebKit always returns auto if the element is positioned
                position = elem.css("position");
                if (position === "absolute" || position === "relative" || position === "fixed") {
                    // IE returns 0 when zIndex is not specified
                    // other browsers return a string
                    // we ignore the case of nested elements with an explicit value of 0
                    // <div style="z-index: -10;"><div style="z-index: 0;"></div></div>
                    value = parseInt(elem.css("zIndex"), 10);
                    if (!isNaN(value) && value !== 0) {
                        return value;
                    }
                }
                elem = elem.parent();
            }
        }
        return 0;
    }
});
汉化 jQuery UI Datepicker 控件
if (jQuery.datepicker) {
jQuery.datepicker.setDefaults({
dayNamesMin: ['日', '一', '二', '三', '四', '五', '六'],
dayNamesShort: ['周日', '周一', '周二', '周三', '周四', '周五', '周六'],
dayNames: ['星期日', '星期一', '星期二', '星期三', '星期四', '星期五', '星期六'],
monthNames: ['一月', '二月', '三月', '四月', '五月', '六月', '七月', '八月', '九月', '十月', '十一月', '十二月'],
monthNamesShort: ['一', '二', '三', '四', '五', '六', '七', '八', '九', '十', '十一', '十二'],
weekHeader: '周',
nextText: '下月>',
prevText: '<上月',
closeText: '完成',
currentText: '今天',
yearSuffix: '年'
});
}JQuery UI Tabs控件扩展addTab方法
/*扩展 jQuery.browser 的属性*/
if (!jQuery.browser) {
    jQuery.browser = {};
}
jQuery.extend(jQuery.browser, {
    /*检查浏览器是否支持CSS3*/
    css3: (function () {
        var css3Div = document.createElement('div');
        if ('border-radius' in css3Div.style) {
            css3Div.style['border-radius'] = '3px';
            return css3Div.style['border-radius'] == '3px';
        }
        else {
            return false;
        }
    })(),
    /*检查浏览器是否支持HTML5*/
    html5: (function () {
        return !!document.createElement('canvas').getContext;
    })()
});
jQuery.widget("ui.tabs", $.ui.tabs, {
    addTab: function (options) {
        var _self = this;
        options = $.extend({
            title: 'New Tab', //标题
            content: '', //内容
            id: 'tab_' + new Date().getTime(), //Id
            enableClose: true, //是否允许关闭
            activate: true //是否激活
        }, options || {});

        var id = "tabs-" + options.id;
        var tab = this.element.find('.ui-tabs-nav li[aria-controls="' + id + '"]');
        if (tab.length < 1) {
            var _li = $('<li></li>').append($('<a></a>').attr('href', '#' + id).html(options.title));
            this.element.find(".ui-tabs-nav").append(_li);
            var _div = $('<div></div>');
            _div.attr('id', id);
            _div.append(options.content);
            this.element.append(_div);
            if (options.enableClose) {
                var _closeBtn = $('<span class="ui-icon ui-icon-close" role="presentation" title="关闭"></span>').click(function () {
                    var _this = $(this);
                    var panelId = _li.remove().attr("aria-controls");
                    $("#" + panelId).remove();
                    if (_li.hasClass('ui-tabs-active')) {
                        _self.element.tabs('option', 'active', _self.element.find(".ui-tabs-nav li").length - 1);
                    }
                });
                _li.append(_closeBtn);
            }
            this.refresh();
            if (options.activate) {
                this._activate(this.element.find(".ui-tabs-nav li").length - 1);
            }
            //解决不支持css3的浏览器问题
            if (!$.browser.css3) {
                _div.height(this.element.innerHeight() - this.element.css('padding-top').replace('px', '') - this.element.find(".ui-tabs-nav").outerHeight(true) - Math.mul(_div.css('margin-top').replace('px', ''), 2));
            }
        } else if (options.activate) {
            var activeIndex = this.element.find(".ui-tabs-nav li").index(tab);
            this._activate(activeIndex);
        }
    }
});
C# .NET 支付宝开放平台API签名
namespace Provider.Payment.Alipay
{
public class AlipayUtil
{
/// <summary>
/// 生成签名
/// 相关文档:https://doc.open.alipay.com/docs/doc.htm?spm=a219a.7629140.0.0.vwCvxF&treeId=62&articleId=104741&docType=1
/// </summary>
/// <param name="obj">要签名的对象</param>
/// <param name="signKey">签名密匙</param>
/// <returns>签名字符串</returns>
public static string GenerateSign(object entity, string signKey)
{
SortedDictionary<string, object> sorted = GetSortedDictionary(entity);
return GenerateSign(sorted, signKey);
}
/// <summary>
/// 生成签名
/// </summary>
/// <remarks>
/// 相关文档:https://doc.open.alipay.com/docs/doc.htm?spm=a219a.7629140.0.0.vwCvxF&treeId=62&articleId=104741&docType=1
/// </remarks>
/// <param name="obj">要签名的对象</param>
/// <param name="signKey">签名密匙</param>
/// <returns>签名字符串</returns>
public static string GenerateSign(SortedDictionary<string, object> sorted, string signKey)
{
StringBuilder builder = new StringBuilder();
foreach (KeyValuePair<string, object> pair in sorted)
{
if (pair.Key != "sign" && pair.Key != "sign_type")
{
object value = pair.Value;
Type type = pair.Value.GetType();
if (type.IsGenericType && type.GetGenericTypeDefinition() == typeof(Nullable<>))
{
type = type.GetGenericArguments()[0];
}
if (type == typeof(DateTime))
{
value = Convert.ToDateTime(value).ToString("yyyy-MM-dd HH:mm:ss");
}
builder.Append(pair.Key + "=" + value + "&");
}
}
string str = builder.Remove(builder.Length - 1, 1).ToString() + signKey;
string sign = MD5Encrypt(str);
return sign;
}
/// <summary>
/// 获得属性值并排序
/// </summary>
/// <param name="entity">参数</param>
/// <returns></returns>
protected static SortedDictionary<string, object> GetSortedDictionary(object entity)
{
Type type = entity.GetType();
PropertyInfo[] propertys = type.GetProperties();
SortedDictionary<string, object> sorted = new SortedDictionary<string, object>();
foreach (PropertyInfo property in propertys)
{
Type propertyType = property.GetType();
object objValue = null;
if (propertyType.IsGenericType && propertyType.GetGenericTypeDefinition() == typeof(Nullable<>))
{
bool HasValue = (bool)type.GetProperty("HasValue").GetValue(entity, null);
if (HasValue)
{
objValue = type.GetProperty("Value").GetValue(entity, null);
}
}
else
{
objValue = property.GetValue(entity, null);
}
string value = (objValue ?? "").ToString();
if (!String.IsNullOrEmpty(value))
{
sorted.Add(property.Name, value);
}
}
return sorted;
}
/// <summary>
/// MD5加密
/// </summary>
protected static string MD5Encrypt(string input)
{
MD5 md5 = MD5.Create();
byte[] bytes = Encoding.UTF8.GetBytes(input);
byte[] buffer = md5.ComputeHash(bytes);
StringBuilder builder = new StringBuilder();
foreach (byte b in buffer)
{
builder.Append(b.ToString("x2"));
}
return builder.ToString();
}
}
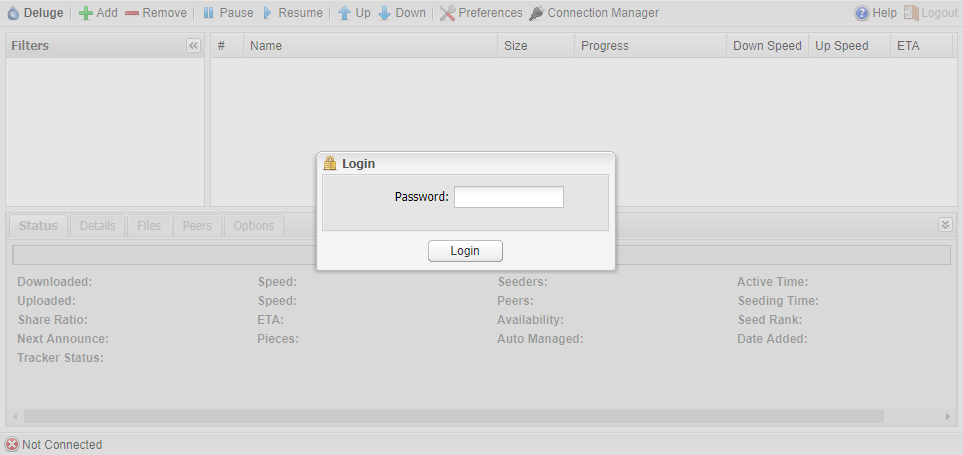
}Ubuntu 安装 deluge 1.3.15 BT客户端
前言
Deluge是一个功能齐全的跨平台BitTorrent 客户端软件,可在Linux, OS X, Unix和Windows操作系统下工作。它使用libtorrent作为其后端,有包括GTK+,网络远程客户端,命令行模式等多种用户界面。其设计方针是体积小巧且节约系统资源,通过丰富的插件来实现核心以外的众多功能。Deluge响应Freedesktop.org的倡议,兼容于GNOME, KDE, XFCE和其它多种桌面环境。它还是一款自由软件,使用GPLv3进行授权。
1、安装 deluge
sudo apt-get install deluge2、安装 deluge web 管理面板
sudo apt-get install deluged deluge-web deluge-consoledeluge 的安装目录在 /usr/lib/python2.7/dist-packages/deluge
如果出现add-apt-repository: command not found错误,执行:
sudo apt-get install python-software-properties3、创建 deluged.service 配置文件
sudo vi /etc/systemd/system/deluged.service复制粘贴:
[Unit]
Description=Deluge Bittorrent Client Daemon
Documentation=man:deluged
After=network-online.target
[Service]
Type=simple
User=root
ExecStart=/usr/bin/deluged -d
ExecStop=/usr/bin/killall -w -s 2 /usr/bin/deluged
Restart=on-failure
TimeoutStopSec=300
[Install]
WantedBy=multi-user.target
4、创建 deluge-web.service 配置文件
sudo vi /etc/systemd/system/deluge-web.service复制粘贴:
[Unit]
Description=Deluge Bittorrent Client Web Interface
Documentation=man:deluge-web
After=network-online.target deluged.service
Wants=deluged.service
[Service]
Type=simple
User=root
ExecStart=/usr/bin/deluge-web
ExecStop=/usr/bin/kill /usr/bin/deluge-web
Restart=on-failure
[Install]
WantedBy=multi-user.target
5、启动 deluged 和 deluge-web 服务,并设置自启动
sudo systemctl start deluged
sudo systemctl enable deluged

sudo systemctl start deluge-web
sudo systemctl enable deluge-web
6、开启远程访问(可选)
deluge-web默认只允许本地访问。默认端口:8112,默认密码:deluge
#启用远程访问
deluge-console "config -s allow_remote True"

#禁用远程访问
deluge-console "config allow_remote"
访问地址:http://你的公网IP:8112
到此,deluge 客户端配置基本完成。
deluge 官方网站:https://www.deluge-torrent.org/